아래 두 과정을 모두 한 후, 이 글에 따라 진행하자
2019/08/06 - [프로그램 설치방법/vscode] - visual studio code 설치
visual studio code 설치
https://code.visualstudio.com/ Visual Studio Code - Code Editing. Redefined Visual Studio Code is a code editor redefined and optimized for building and debugging modern web and cloud applications...
sheenji.tistory.com
2019/08/06 - [프로그램 설치방법/vscode] - c/c++ 설치하기 (mingw-w64)
c/c++ 설치하기 (mingw-w64)
MinGW-w64 - for 32 and 64 bit Windows Download MinGW-w64 - for 32 and 64 bit Windows for free. A complete runtime environment for gcc. The mingw-w64 project is a complete runtime environment for gcc..
sheenji.tistory.com

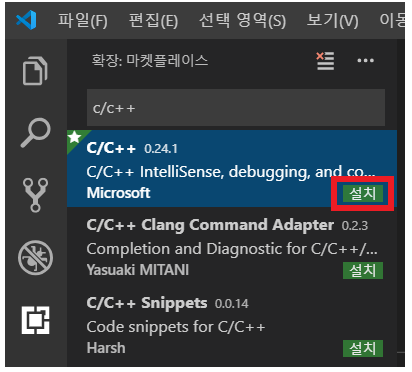
- c/c++ 검색 후 설치
- mingw-w64 컴파일러 설정
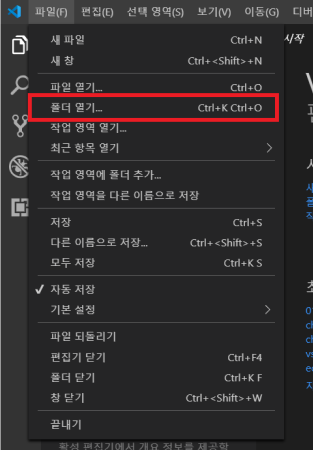
- ctrl + k, o를 눌러 파일 열기를 한다
- 혹은 파일 → 폴더 열기를 눌러 vscode에서 작업할 폴더를 생성한다.

- mingw-w64 컴파일러 설정
- ctrl + k, o 를 눌러 파일 열기를 한다
- 혹은 파일 → 폴더 열기를 눌러 vscode에서 작업할 폴더를 생성한다.

- Ctrl + Shift + p 를 눌러 찾기 모드를 연다.
- C/C++:Edit Configurations(JSON) 선택

- c_cpp_properties.json 생성됨
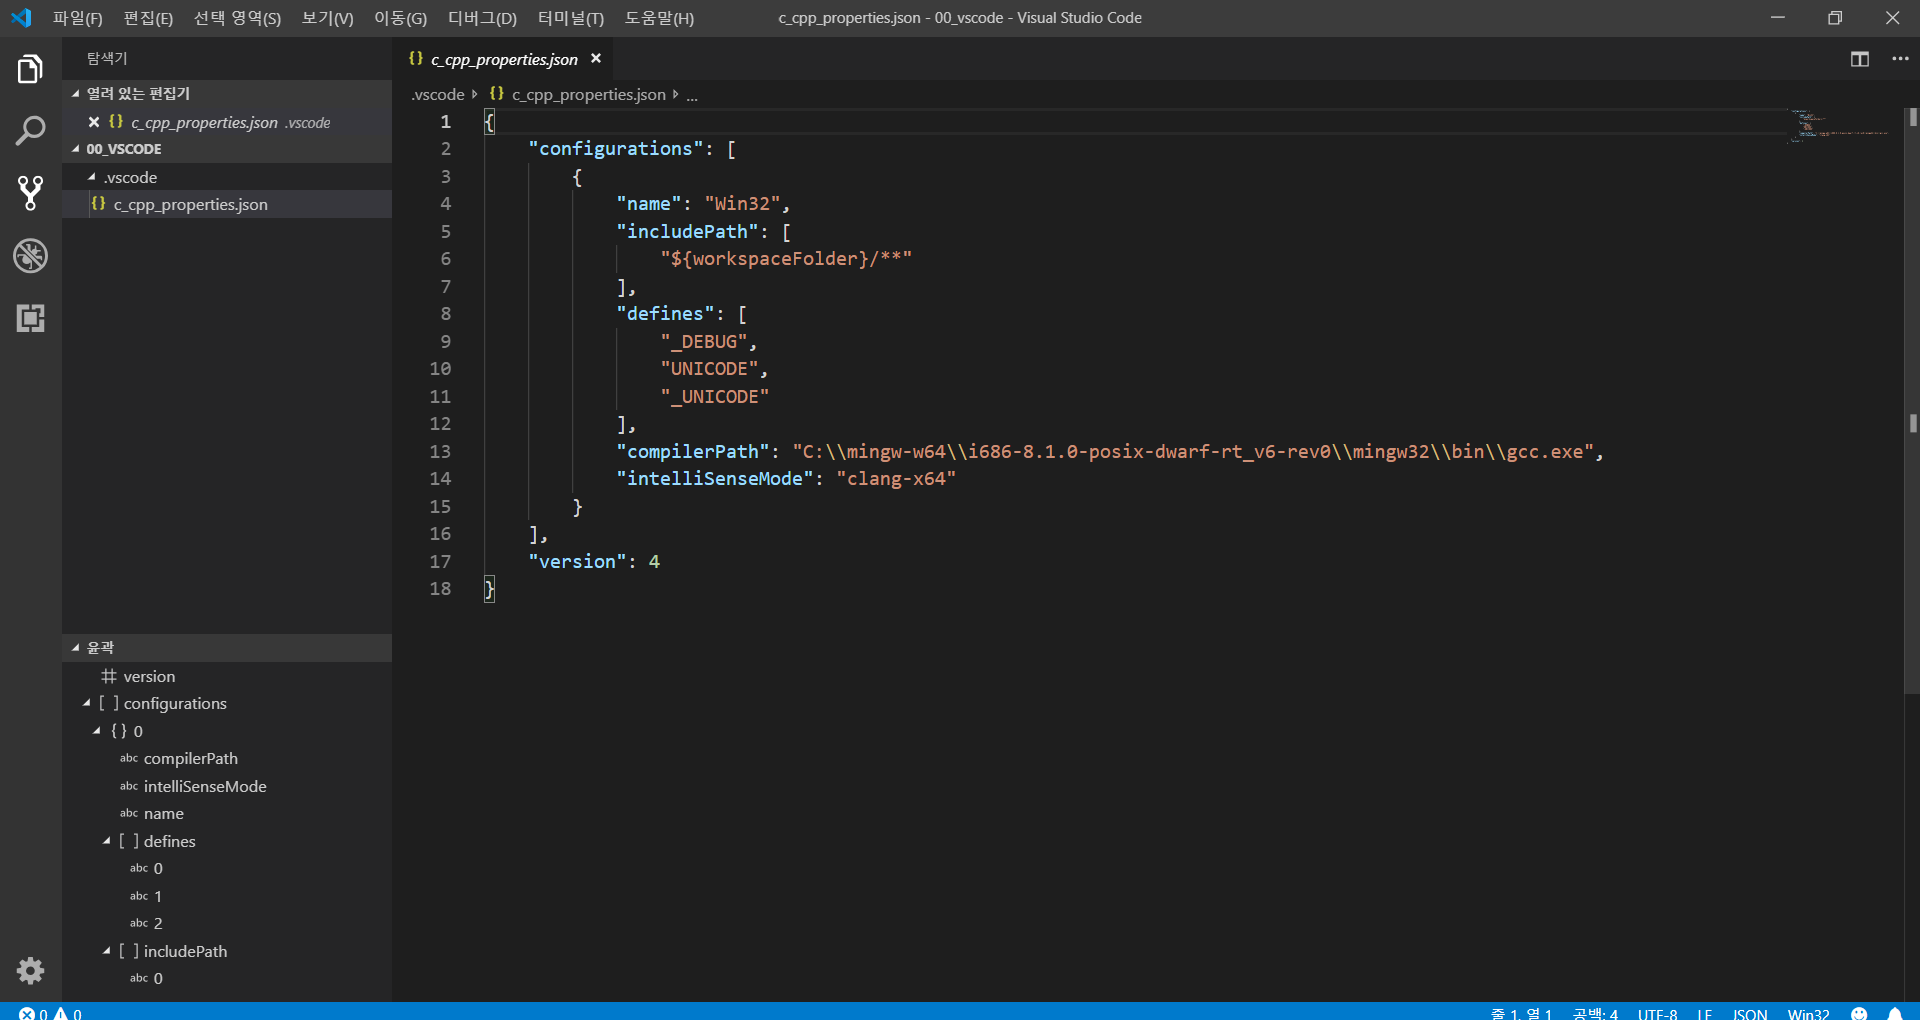
- compilerPath를 앞 글에서 컴파일러를 깐 위치로 변경해 준다.

- 빌드 및 디버깅
- Ctrl + Shift + p 를 통해 Tasks: Configure task를 선택한다.

- Create Tasks.json file 옵션을 선택한다.

- others를 선택한다.

- tasks.json 파일이 생성된다.

- 다음과 같이 정의한다.
{ // 한 파일에서 컴파일, 여기에선 a.exe로 진행한다.
    "version": "2.0.0",
    "tasks": [
        {
            "label": "compile",
            "type": "shell",
            "command": "g++",
            "args": [
                "-g",
                "${file}"
            ],
            "group": {
                "kind": "build",
                "isDefault": true
            }
        }
    ],

}
{ // 한 파일당, 같은 이름으로 만들어서 컴파일, ex) a.cpp 실행 -> 같은 폴더에서 a.exe 만들어짐
"version": "2.0.0",
"tasks": [
{
"label": "compile",
"type": "shell",
"command": "g++",
"args": [
"-g",
"${file}",
"-o",
"${fileDirname}\\${fileBasenameNoExtension}.exe"
],
"group": {
"kind": "build",
"isDefault": true
}
}
],
}- 디버깅
- 먼저 디버깅을 설정하기 전에 helloworld.cpp 파일을 만들어 준다.

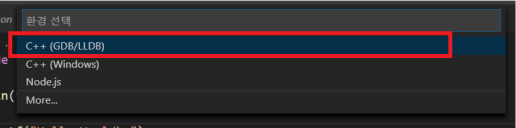
- 디버깅 단축키인 F5 버튼을 누르면 다음과 같이 나온다.

- 디버깅 단축키인 F5 버튼을 누르면 다음과 같이 나온다.

- 생성된 launch.json 파일을 다음과 같이 수정해 준다.
{
    // IntelliSense를 사용하여 가능한 특성에 대해 알아보세요.
    // 기존 특성에 대한 설명을 보려면 가리킵니다.
    // 자세한 내용을 보려면 https://go.microsoft.com/fwlink/?linkid=830387을(를) 방문하세요.
    "version": "0.2.0",
    "configurations": [


        {
            "name": "(gdb) Launch",
            "type": "cppdbg",
            "request": "launch",
            "program": "${workspaceFolder}/a.exe", // 위에서 첫번째 과정 사용시 이 부분 사용
            // "program": "${fileDirname}\\${fileBasenameNoExtension}.exe", // 위에서 두번째 과정 사용시 이 부분 사용
            "args": [],
            "stopAtEntry": false,
            "cwd": "${workspaceFolder}",
            "environment": [],
            "externalConsole": false,
            "MIMode": "gdb",
            "miDebuggerPath": "C:/mingw-w64/x86_64-8.1.0-win32-seh-rt_v6-rev0/mingw64/bin/gdb.exe",
            "setupCommands": [
                {
                    "description": "Enable pretty-printing for gdb",
                    "text": "-enable-pretty-printing",
                    "ignoreFailures": true
                }
            ],
            "preLaunchTask": "compile"
        }
    ]
}
반응형
'프로그램 설치방법 > vscode' 카테고리의 다른 글
| c/c++ 설치하기 (mingw-w64) (0) | 2019.08.06 |
|---|---|
| visual studio code 설치 (0) | 2019.08.06 |